BattleForge Wiki
Advertisement
LoadingScreen Hope
Defending Hope
link=Map:
Scenario Overview
# Players 1
Difficulty Std, Adv, Exp

Defending Hope is the third Scenario in the The Curse Campaign.

The Skylords are gathering the mortals in the city Hope. The Twilight has picked up their scent and is closing in on all sides. Defend the town and the two soulstones, powerful and important relics.

Defending Hope is a single-player map that can be played on standard, advanced, and expert difficulties.

Goals[]

  • The Soulstones
    • Repel every enemy attack on the Soulstones
    • Clear a way into the town for Rogan, he must survive.

Deck[]

This walkthrough has been played with the FROST deck. It can be played with other decks too

Orb FrostOrb FrostOrb FrostOrb Frost Defending Hope
1st Era Cards
Creature Cards Building Cards Spell Cards
Master Archers-0

Master Archers

Abilities[]

AbilityIcon AutoCast Crossbow Attack

Every 2 seconds, unit fires bolts at enemies that deal 5 damage.
Master Archers-0
Northguards-0

Northguards

Abilities[]

Brave Defenders

No special abilities
Northguards-0
Imperials-0

Imperials

Abilities[]

AbilityIcon Toggled Defensive Stance

Power: 30
Enable to gain: Resilient and Slow

AbilityIcon Passive Resilient

Takes 40% less damage.

AbilityIcon Passive Slow

Slow movement.
Imperials-0
Defense Tower-0

Defense Tower

Abilities[]

AbilityIcon AutoCast Frost Bolt

Every 2 seconds, tower hurls a frostly bolt that deals 50 damage to enemies in a 5m radius around its target, up to 75 in total.
Defense Tower-0
Glacier Shell-0

Glacier Shell

Abilities[]

Encase in Ice

An own building is covered in a icy shield, absorbing 75% damage for up to 1300 damage total. Last for 30 seconds. Reusable every 20 seconds.
Glacier Shell-0
2nd Era Cards
Creature Cards Building Cards Spell Cards
Defenders-0

Defenders

Abilities[]

AbilityIcon AutoCast Crossbow Attack

Every 2 seconds, unit fires bolts at enemies that deal 9 damage.

AbilityIcon Toggled Stand Ground

Enable to become immobile and gain:

AbilityIcon Passive Resilient

Takes 40% less damage.

AbilityIcon Passive Steadfast

Cannot be knocked back.
Defenders-0
Phalanx-0

Phalanx

Abilities[]

AbilityIcon Toggled Defensive Formation

Enable to gain: Payback, Steadfast, and Slow.

AbilityIcon Passive Payback

When being trampled, each member of this squad deals 230 damage to enemy.

AbilityIcon Passive Steadfast

Cannot be knocked back.

AbilityIcon Passive Slow

Slow movement.
Phalanx-0
War Eagle-0

War Eagle

Abilities[]

AbilityIcon AutoCast Screech

Every 3 seconds, unit can perform a piercing shriek that deals 170 damage to enemies in a 5m radius around its target, up to 250 in total. Only affects ground targets.

AbilityIcon Activatable Sonic Scream

Power: 60
Activate to fill a target area with sonic shockwaves, doing 500 damage to enemy units, up to 900 in total. Knocks back small and medium units. Only affects ground targets. Reusable every 10 seconds.
War Eagle-0
Cannon Tower-0

Cannon Tower

Abilities[]

AbilityIcon AutoCast Cannon

Every 2 seconds, tower launches a cannon ball that deals 140 damage to enemies in a 8m radius around its target, up to 210 in total. Knocks back small units. Affects ground targets only.
Cannon Tower-0
Coldsnap-0

Coldsnap

Abilities[]

AbilityIcon Spell Area Freeze

Freezes up to 5 enemies in a 20m radius for 15 seconds. After freeze wears off, targets are immune against Freeze for 10 seconds. Reusable every 20 seconds.
Coldsnap-0
3rd Era Cards
Creature Cards Building Cards Spell Cards
Silverwind Lancers-0

Silverwind Lancers

Abilities[]

AbilityIcon Passive Swift

Moves at high speed.

AbilityIcon Passive Stomp

Tramples small units.
Silverwind Lancers-0
Tremor-0

Tremor

Abilities[]

AbilityIcon Activatable Ground Slam

Power: 30
Activate to emit a shockwave, dealing 85 damage to units and 425 to structures in 15m radius, up to 600 in total. Additionally the damage bonus against structures applies as well. Knocks back small and medium units. Only affects ground targets. Reusable every 15 seconds.

AbilityIcon Passive Slow

Slow movement.

AbilityIcon Passive Siege

Deals 50% more damage against structures.
Tremor-0
Armored Tower-0

Armored Tower

Abilities[]

AbilityIcon AutoCast Ice Bolt

Every 2 seconds, tower hurls an ice bolt that deals 110 damage to enemies in a 5m radius around its target, up to 170 in total.

AbilityIcon Activatable Gift of Ice

Power: 0
Friendly entities in a 25m radius take 50% less damage for 30 seconds or until a total of 5200 damage has been absorbed.
Armored Tower-0
Ward of the North-0

Ward of the North

Abilities[]

AbilityIcon Spell Protective Ice

Friendly units and structures in a 15m radius take 50% less damage until 7800 damage has been absorbed. Lasts for 30 seconds. Reusable every 20 seconds.
Ward of the North-0
4th Era Cards
Creature Cards Building Cards Spell Cards
Construct-0

Construct

Abilities[]

AbilityIcon AutoCast Arcane Turret

Every 5 seconds, unit fires a ball of energy that deals 690 damage to enemies in a 10m radius around its target, up to 1030 in total. Knocks back small, medium, large and extra large units. Affects ground targets only.

AbilityIcon Passive Siege

Deals 50% more damage against structures.
Construct-0
Maelstrom-0

Maelstrom

Abilities[]

AbilityIcon Spell Massive Blizzard

Casts 10 frosty windstorms, each dealing 200 damage to enemy units in a 25m radius, up to 600 in total, and freezing them after some time. Reusable every 20 seconds.
Maelstrom-0


Walkthrough[]

Walkthrough Defending Hope

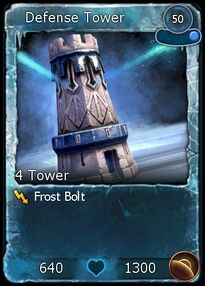
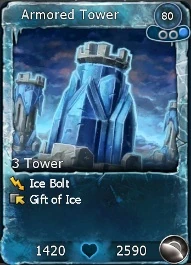
After starting at S, where you already have one Orb, four Power Wells and Defense Towers, you will see that both Soulstones (R1 and R2) are under attack. Send some archers to both Soulstones to kill the attackers. After you have repelled the first attack, claim the wells and Monuments around the Soulstones (R1 and R2) and summon Frost orbs. Raise the fortifications at E1 – E4 and place squads of archers on the walls. You should also build towers behind the walls and wait for the enemy attacks. Slowly strengthen your defenses with more archers and towers.

Rogan Kayle arrives at R5 to find his path to the town is blocked by enemies at R4. Build a small force of melee and ranged units and move to R3 to claim the Power Wells. From R3, move your units to R4 to clear a path for Rogan and his men. After you do so, Rogan will move his men into town via the gate at E4. Claim the Monument at R4.

There are four Spawncamps in the corners of the map (R6-R9). It is advisable that you do not attack them, but focus on defending the town and keeping the Soulstones and Rogan Kayle safe. If you need additional resources, you can claim the Power Wells at R10 and R11.

When the Soulstones have regenerated, you must make a defensive stand for 10 minutes. The waves of attack get stronger and stronger. You are under pressure from all sides. Try to keep the fortress walls at E1-E4 intact and supported by towers. If you can keep the Soulstones and Rogan Kayle safe from the onslaught until the timer reaches zero, victory is yours.

Artwork Soulstone
  1. Towers are very useful for this mission because of its defensive setting.
  2. The main goal is to protect the soulstones. If one of them gets destroyed the mission is lost.
  3. Destroying some of the spawncamps can take away some of the pressure from your defenses. But don’t forget to keep an eye on the soulstones.
  4. The main enemy attacks are coming from 4 spawncaves. Those cannot be destroyed and you shouldn’t waste any resources on attacking them.
  5. Keep an eye on your Monuments and Power Wells. They may be attacked. You can help fortify them by building a tower.

Rewards[]

For completing this scenario, players are granted some PvE Experience Points, Gold, and two Upgrade Cards.


{{Loot row|Map:Defending Hope|Stone Launcher|III|Stonekin|Mo|Expert|Tapppppppppppppppppppppppppppppppppppppppppppppppppppppppppppppppppppppppppppppppppppppppppppppppppppppppppppppppppppppppppppppppppppppppppppppppppppppp}

Scenario Progression[]

Completing this scenario unlocks the following scenarios:


Upgrade Faction Scenario Difficulty Edit Link
Infused Architect's Call I Frost Defending Hope Standard [edit]
Cannon Tower I Frost Defending Hope Standard [edit]
Curse of Oink I Nature Defending Hope Standard [edit]
Deathglider I Twilight Defending Hope Standard [edit]
Executor I Shadow Defending Hope Standard [edit]
Infused Firesworn I Fire Defending Hope Standard [edit]
Fleshbender I Twilight Defending Hope Standard [edit]
Frost Mage I Frost Defending Hope Standard [edit]
Frost Sorceress I Frost Defending Hope Standard [edit]
Blessed Green Peace I Nature Defending Hope Standard [edit]
Infused Incubator I Shadow Defending Hope Standard [edit]
Blessed Lost Converter I Lost Souls Defending Hope Standard [edit]
Tainted Lost Reaver I Lost Souls Defending Hope Standard [edit]
Morklay Trap I Fire Defending Hope Standard [edit]
Nox Trooper I Shadow Defending Hope Standard [edit]
Scavenger I Fire Defending Hope Standard [edit]
Shaman I Nature Defending Hope Standard [edit]
Strikers I Fire Defending Hope Standard [edit]
Swiftclaw I Nature Defending Hope Standard [edit]
Unholy Power I Shadow Defending Hope Standard [edit]
Defense Tower II Frost Defending Hope Advanced [edit]
Drones II Nature Defending Hope Advanced [edit]
Fire Bomb II Fire Defending Hope Advanced [edit]
Magma Hurler II Fire Defending Hope Advanced [edit]
Magma Spore II Fire Defending Hope Advanced [edit]
Mutating Frenzy II Shadow Defending Hope Advanced [edit]
Gifted Necroblaster II Shadow Defending Hope Advanced [edit]
Infused Northland Drake II Frost Defending Hope Advanced [edit]
Blessed Pyromaniac II Fire Defending Hope Advanced [edit]
Ray of Light II Nature Defending Hope Advanced [edit]
Silverwind Lancers II Frost Defending Hope Advanced [edit]
Shadow Insect II Shadow Defending Hope Advanced [edit]
Tainted Stranglehold II Nature Defending Hope Advanced [edit]
Swamp Drake II Nature Defending Hope Advanced [edit]
Tremor II Frost Defending Hope Advanced [edit]
Undead Army II Shadow Defending Hope Advanced [edit]
Fire Bomb III Fire Defending Hope Expert [edit]
Magma Hurler III Fire Defending Hope Expert [edit]
Magma Spore III Fire Defending Hope Expert [edit]
Defense Tower III Frost Defending Hope Expert [edit]
Infused Northland Drake III Frost Defending Hope Expert [edit]
Silverwind Lancers III Frost Defending Hope Expert [edit]
Tremor III Frost Defending Hope Expert [edit]
Mutating Frenzy III Shadow Defending Hope Expert [edit]
Shadow Insect III Shadow Defending Hope Expert [edit]
Undead Army III Shadow Defending Hope Expert [edit]
Gifted Necroblaster III Shadow Defending Hope Expert [edit]
Drones III Nature Defending Hope Expert [edit]
Ray of Light III Nature Defending Hope Expert [edit]
Swamp Drake III Nature Defending Hope Expert [edit]
Tainted Stranglehold III Nature Defending Hope Expert [edit]
Completed Scenario Difficulty Unlocked Scenario Difficulty Edit Link
Defending Hope Standard The Soultree Standard [edit]
Defending Hope Advanced The Soultree Advanced [edit]
Defending Hope Expert The Soultree Expert [edit]


Skylords

Battleforge has been revived by a group of passionate players and developers under the name Skylords Reborn


It is a fully functional, community-made, non-profit and completely free-to-play relaunch of the game. The relaunch has been worked on for several years, and receives regular updates.

The new Wiki can be found here: Skylords Reborn Wiki Page


.
Advertisement